Warning
This installation method may "timeout" on slower web servers, and for that reason we officially only recommend the FTP installation method.
It’s a good idea to first make sure that your web server meets the minimum requirements to run TubePress:
Please note that these are the minimum requirements and TubePress will also work with all later versions of PHP and WordPress. Not sure if your server meets these requirements? You should either:
Ask your hosting provider or
Install a WordPress plugin that prints out your system information. Here are some examples:
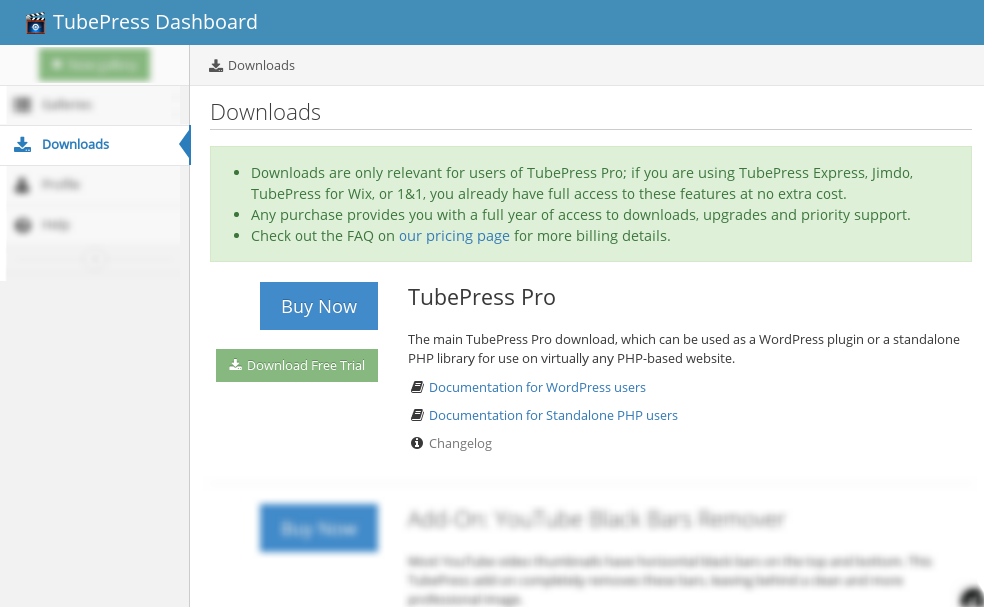
Visit the Downloads page in the TubePress Dashboard. If you've already paid for TubePress Pro, please skip to step 5.
On the Downloads page, you'll see a list of available downloads with TubePress Pro at the top. You may download the free trial version of TubePress here, or you may click the "Buy Now" button when you are ready to buy.
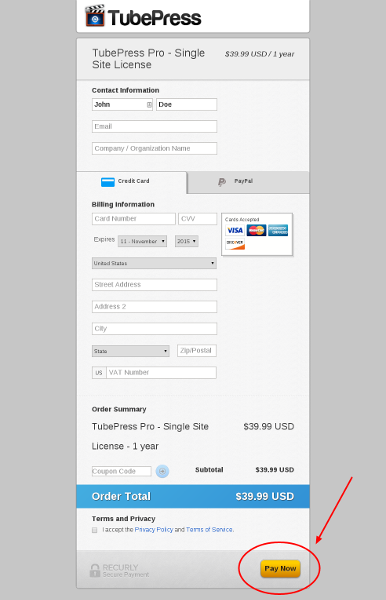
Once you've chosen the TubePress Pro license applicable to you, you'll be presented with a secure payment page where you may choose to pay with credit card or PayPal. Enter your billing information, review and accept our Privacy Policy and Terms of Service, and click "Pay Now".
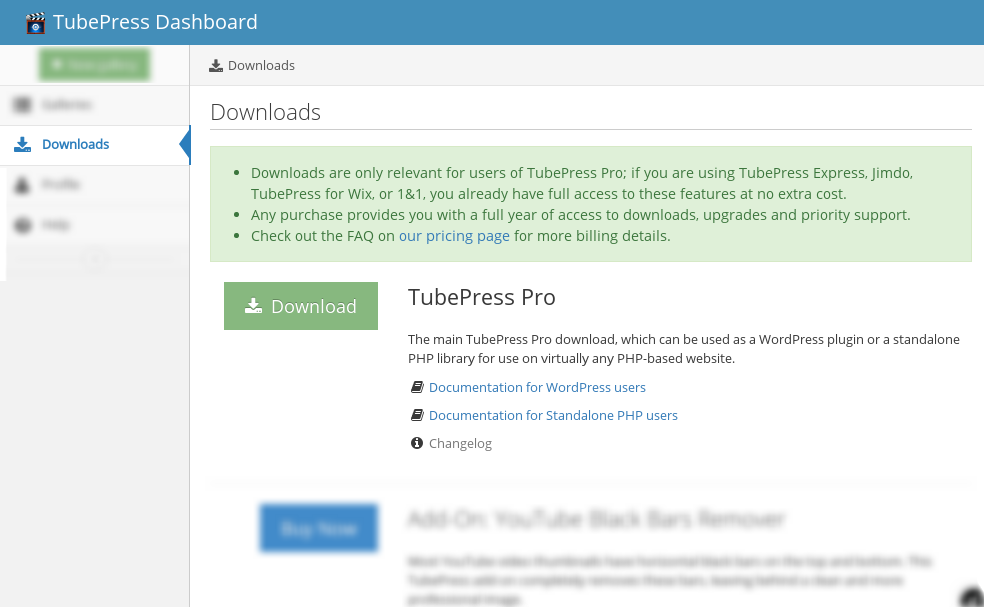
After payment is complete, you'll be redirected to a Thank You page. Revisit the Downloads page where you will now have access to TubePress Pro.
TubePress can be installed just like any other WordPress plugin, though since we don’t distribute through the wordpress.org plugin repository, you’ll have to install the plugin manually. Thankfully, WordPress provides excellent documentation on how to manually install plugins.
wp-content/plugins folder in your WordPress directory on your web server. WP Admin > Plugins and find TubePress in your plugin list. If you are using TubePress Pro, you may want to proceed with these optional installations.
If you would rather not use FTP to upload TubePress, you may attempt to install the plugin directly from within the WordPress administration panel. This method may also be faster than using FTP.
Download TubePress as a zip file to your local machine.
From your WordPress admin dashboard, click the link at Plugins > Add New

At the top of the page, click the "Upload Plugin" link.
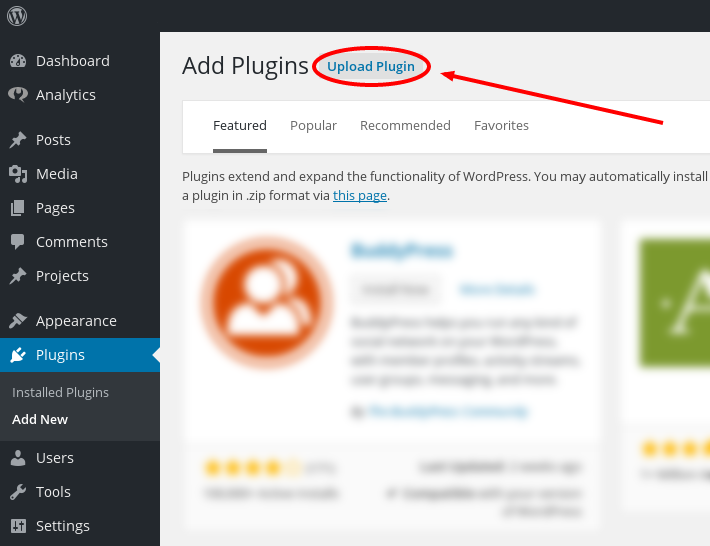
Select the zip file that you downloaded in step 1, then click the "Install Now" button.

If the installation succeeds, you'll see the following screen. Click the Activate Plugin link.

If you are using TubePress Pro, you may want to proceed with the optional installations outlined below.
Due to licensing restrictions, TubePress Pro does not ship with every library that the free trial plugin includes. However, these optional libraries may be installed manually as follows:
TubePress can use JW Player 5.10 to play YouTube videos. We are working to integrate JW Player 7.x, but this feature is not yet ready for production.
Download the file player.swf from here.
Upload the file to your TubePress Pro installation at
wp-content/tubepress-content/vendor/jwplayer/v5/player.swf
You may need to create the vendor directory and its subdirectories.
Download Shadowbox.js from here.
The download will save to a file named shadowbox-3.0.3.zip. Unzip this file, and it will expand into a directory named shadowbox-3.0.3.
Copy the contents of this directory (not the directory itself) to your TubePress Pro installation at wp-content/tubepress-content/vendor/shadowboxjs/v3/. You may need to create the vendor directory and its subdirectories.
Optional. You may see scrollbars in the Shadowbox.js display. To fix this, simply edit shadowbox.css. On line 8, remove the overflow:auto attribute, i.e. change it from
#sb-player.html{height:100%;overflow:auto;}to
#sb-player.html{height:100%;}